

World Photography Day is a great opportunity to hone your editing skills, and Adobe Lightroom is the perfect tool to help you do that, here are essential Adobe Lightroom tips. This powerful, feature-rich app is trusted by photographers worldwide to transform good photos into great ones. Here are five expert tips from Adobe Lightroom product manager Benjamin Warde that will help you unlock Lightroom’s full potential and take your photography to the next level.
1. Speed Up Batch Edits with AI
One of the most time-consuming aspects of photo editing is applying masks to multiple photos, especially when the composition changes slightly from one shot to the next. Traditionally, you’d have to adjust the mask for each individual photo, which can become tedious and repetitive. However, Lightroom’s new AI-powered subject detection feature changes the game by allowing you to copy and paste all your settings—including masks—across multiple images. This means that Lightroom can automatically detect and mask the subject in each photo, applying your edits in one swift action.

Additionally, Lightroom’s Denoise AI feature can also be applied to multiple photos at once. By selecting all the images you want to enhance and choosing the “Enhance” option in the Photo menu, you can dramatically reduce noise across your entire batch of photos with minimal effort.
2. Explore Creative Possibilities with Versions
Adobe Lightroom Versions feature is an evolution of the traditional history tool found in many Adobe apps. While history tools allow you to undo and tweak previous edits, Versions takes it a step further by letting you create and save multiple versions of the same image without duplicating the file. This feature is perfect for experimenting with different styles and edits, as you can easily compare your various versions and choose the one that best fits your vision.

What’s more, Lightroom automatically saves edits as you work, so you never have to worry about losing your progress. You can even create custom Named Edits, which are associated with the image and can be exported all at once, making it easy to manage and share your different creative interpretations.
3. Perfect Your Photos with Guided Uprights
If you’ve ever taken a photo that looks slightly tilted or distorted, Adobe Lightroom’s Guided Uprights tool is here to help. This powerful geometry tool allows you to restore balance and straighten your images with just a few clicks. Simply draw along the horizontal and vertical lines that need to be corrected, and Lightroom will automatically adjust the image to make it level.

The Guided Uprights tool is especially useful for architectural photography, where straight lines and balanced compositions are key. And don’t forget to use the “Constrain Crop” option to remove any blank areas that might appear after the adjustments are made, ensuring that your final image looks clean and polished.
4. Fine-Tune Colors with Targeted Adjustment
Color correction is an essential part of the editing process, and Lightroom’s Hue, Saturation, and Luminance tools are a go-to for many photographers. However, there’s an even more precise way to adjust individual colors in your photos: the Targeted Adjustment tool. This feature allows you to click on the specific color you want to modify and drag left or right to brighten or darken it instantly.

This method is not only quick and easy, but it also offers a level of precision that global adjustments or preselected colors in the Color Mixer panel can’t match. By fine-tuning the colors in your images with the Targeted Adjustment tool, you can achieve a more accurate and visually appealing result.
5. Easily Remove Distractions with Generative Remove
Sometimes, even the best photos can be marred by unwanted objects or distractions in the background. Lightroom’s new Generative Remove feature, powered by Firefly AI, makes it easier than ever to clean up your images and keep the focus on your main subject. Whether it’s a small dust speck or a larger, more distracting element, Generative Remove can convincingly eliminate it from your photo with just a few clicks.
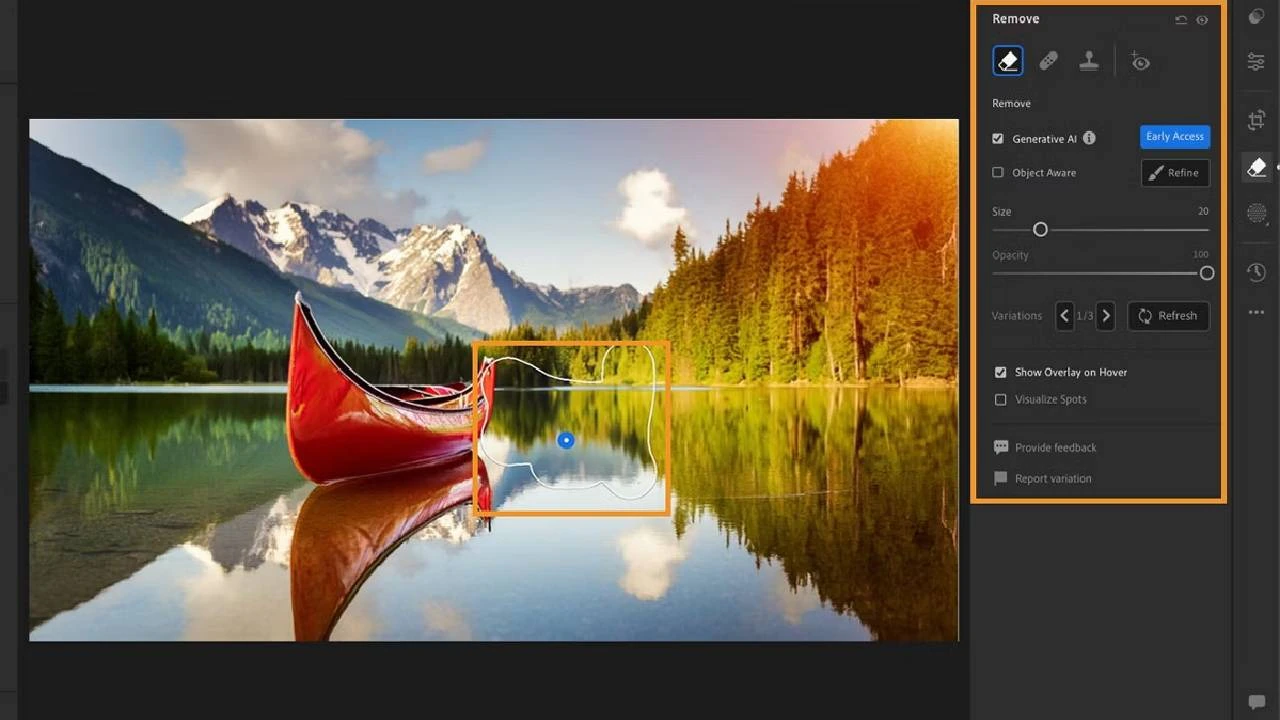
What’s great about this feature is that you’re not limited to a single outcome. Lightroom gives you three different removal results to choose from, so you can pick the one that looks the most natural and seamless. And if you’re planning to crop your image, it’s a good idea to use Generative Remove first to clean up any distractions before finalizing your composition.